
In GaussView6, you can save animations and molecule group animations as movie files. To do so, click on the Movie, Animation option in the GaussView Preferences window.
GaussView offers settings that allow you to specify defaults of the generated movie. You can adjust these aspects according to your needs, via the Movie, Animation Preferences.
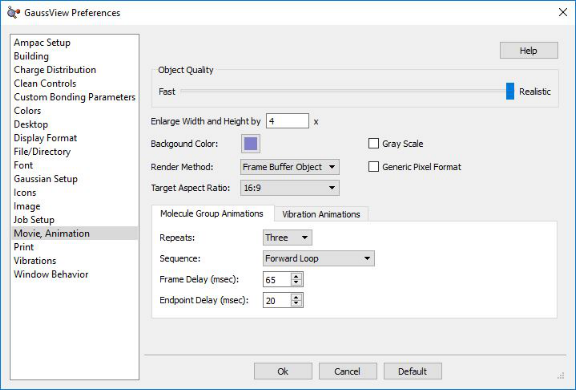
GaussView Movie Preferences
Movie Quality & Related Options:
With these controls, you can modify several movie generations options such as its quality, width, height, background color, render method and aspect ratio.
- Object Quality: Specifies the movie quality. Moving the slider toward the Realistic end of the scale increases the file size and the time required to generate the movie file.
- Enlarge Width and Height: Sets the default movie scaling factor.
- Background Color: Background color for View windows in the movie.
- Render Method: Specifies the rendering method. This setting should seldom be changed from the default.
- Target Aspect Ratio: Describes the proportional relationship between the width of the movie frame and its height. 16:9 is the correct setting for HD movies intended for the internet.
- Gray Scale: Convert the movie to gray scale (i.e., black and white) before capturing. The default is to save a color movie.
- Generic Pixel Format: Use the system software renderer. This option should be checked only after rendering problems/failures have been encountered during movie capture or printing.
The Molecule Group Animations and Vibration Animations tabs both contain these controls for specifying aspects of the animation:
Repeating and Delaying GaussView Movie Controls:
These controls allow you to repeat your animation or delay the frame or endpoint.
- Repeats: Controls how often, if at all, the animation should repeat after the Start Animation button has been pressed.
- Frame Delay: The time, in milliseconds, that the rendering engine waits before moving on to the next image in the movie.
- Endpoint Delay: Indicates, in milliseconds, how long the delay is between the end of the animation and the start of the next loop.
The Molecule Group Animations also lets you specify the forward or reverse direction for the animation:
- Sequence: Used to play the movie backwards, forwards or combinations of the two.
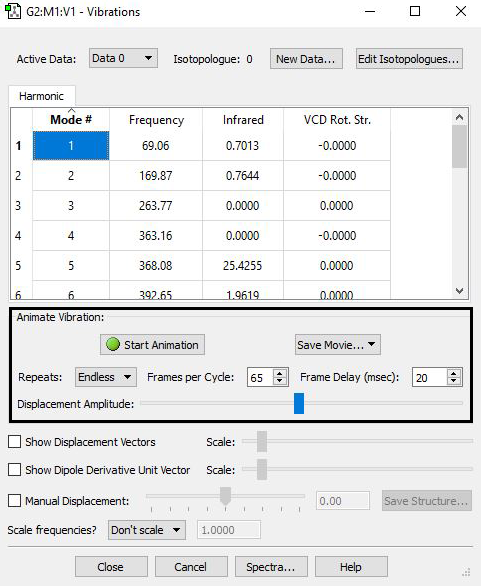
Vibrations Dialog for Molecular Vibration Animations
For molecular vibration animations, some settings can be specified in the Vibrations dialog when creating a movie: These settings include start and stop animation, repeats and frames per cycle and frame delay adjustments. Note that in order to save a movie file, the animation cannot be playing.
To save a movie animating the current molecule group, use the Save Movie icon in the toolbar.

Save Movie Menu
When saving a movie, you have three options, Gif Movie File, MPEG -4Movie File or a MNG Movie File. MPEG-4 is the recommended file type for movies destined for YouTube or other websites.

Available Formats for Movies
When saving a movie frame, there is the option of choosing between a PNG, JPEG, TIFF, BPM, GIF, and PPM files. JPEG is the most commonly used file format.

Movie Frame Available File Types
Downloading and Installing the FFmpeg Software
In order to create MP4 movies in GaussView 6, you must first download and install a free software program. The program is called FFmpeg, and it can be downloaded from ffmpeg.org
In this example, we will be providing a step by step guide on how to download the software on a Windows computer. The process is similar for Linux and Mac OS X
Here is the main window for the FFmpeg site:
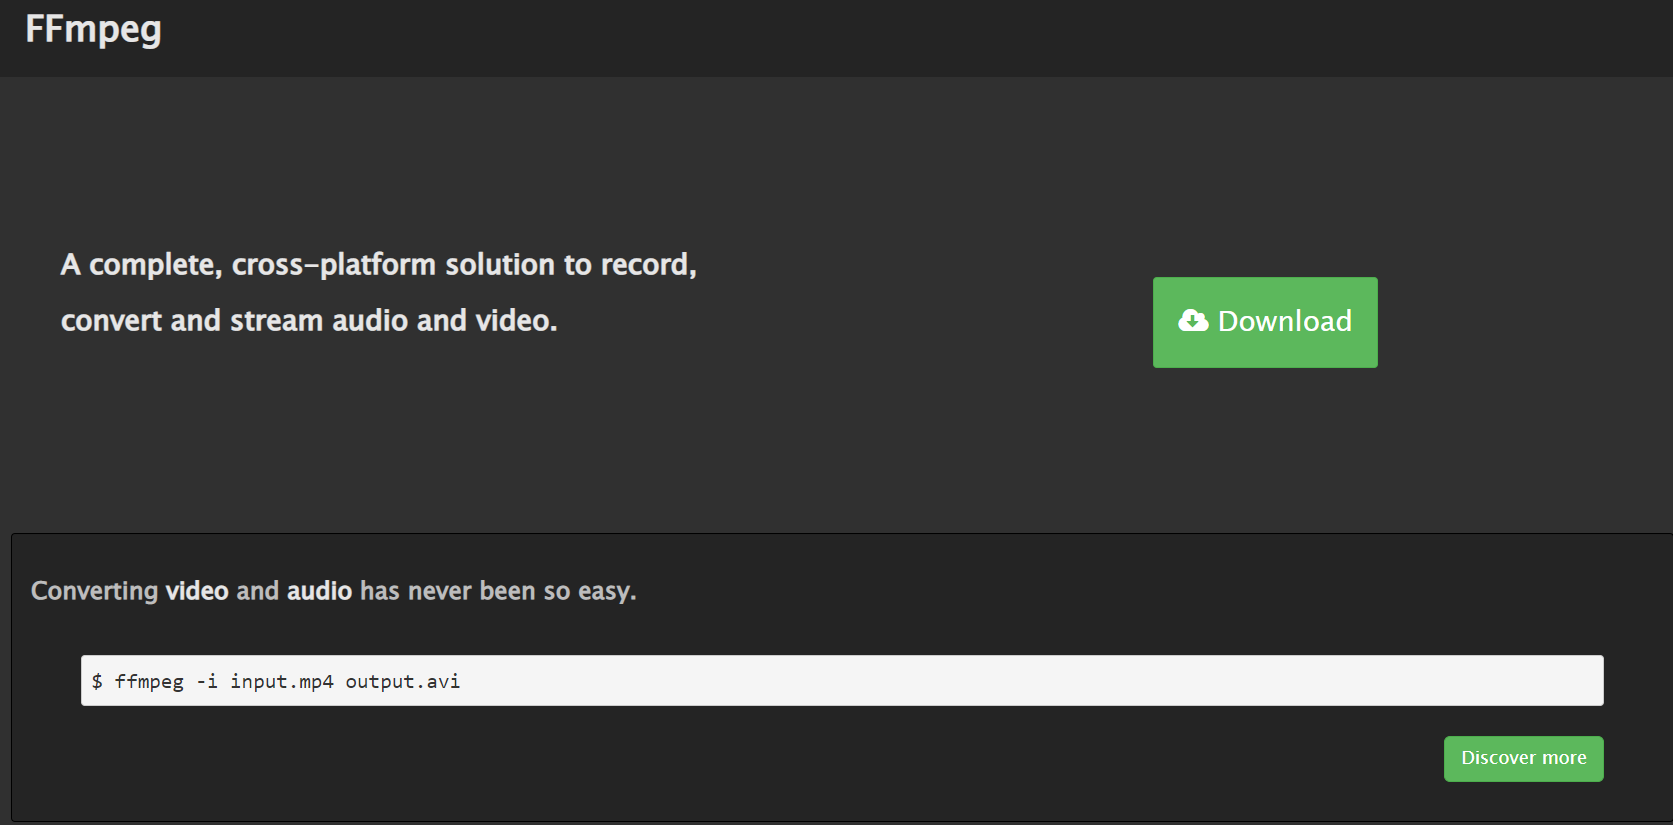
STEP 1: Click the Download button. After doing so, a download window will appear with options for the Linux, Windows, and Mac OS X operating systems.
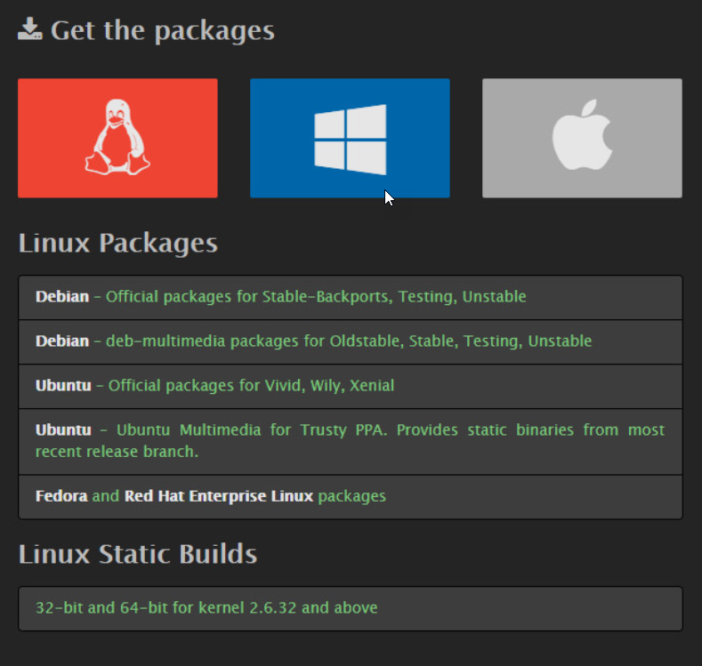
STEP 2: Once this screen is reached, hover over the Windows logo to reveal the Windows Packages list:
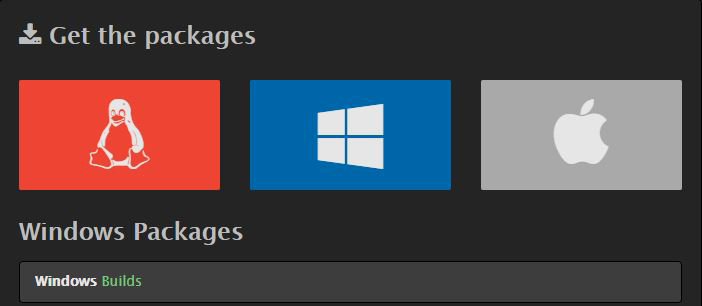
STEP 3: Click on Windows Builds to access the Windows download page. You will be directed to a FFmpeg Builds page with Version, Architecture and Linking options. Make sure to download the correct version for your computer. We selected Version 4.0 (the stable released version), Windows 64-bit and Static Linking:
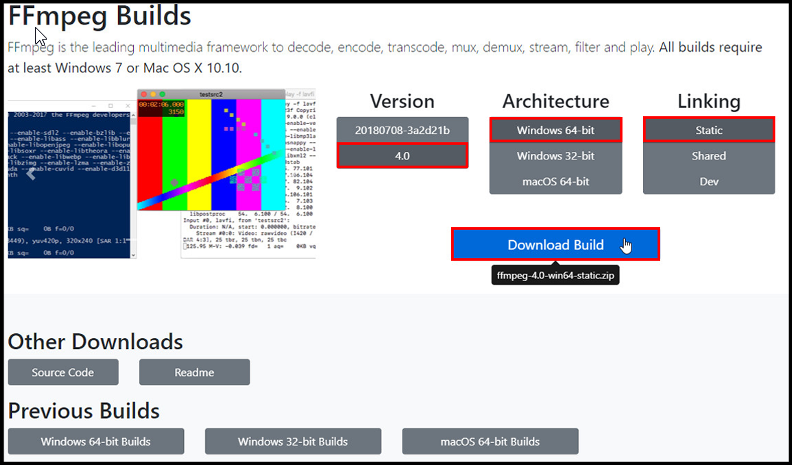
When you click Download Build, a download progress area will appear at the bottom of your browser.


The downloaded file is a compressed archive; on Windows systems, it is a ZIP archive.
STEP 4: Once the download completes, click on the file icon in your browser. A new folder with the software will appear on your desktop,
STEP 5: Open that folder, and then open the bin folder inside it.

Within the bin folder, you will find three separate files. The file that you want is the ffmpeg.exe file.

STEP 6: To complete the download, you will then drop the ffmpeg.exe file in the bin folder under Gaussview-6.0.

Last updated on: 19 July 2019.